|
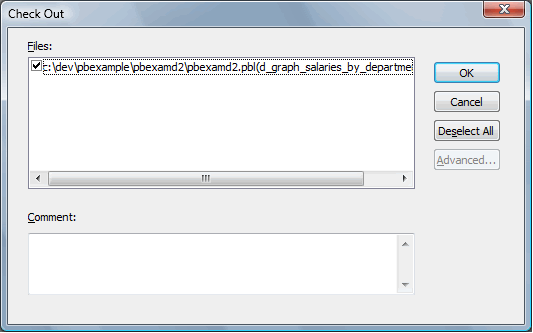
How to Use the Major PowerVCS Source Control Functions with PowerBuilder: 1. Check out objects to PowerVCS Check out objects from the PowerBuilder IDE (Integrated Development Environment) by right-clicking (or selecting a range and right-clicking) and choosing Check Out...
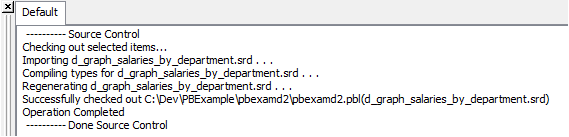
A window is displayed to confirm the selection and provide for a Comment. When you click OK, the object is checked out to the PBL where the object was stored when it was added to source control. That is, you don’t have any control over which PBL receives the object. When a Check Out occurs, the object is checked out of PowerVCS as a text file, to the same folder that holds the PBL. Then PowerBuilder automatically imports the object into the PBL, regenerating it as part of the import. This process is reflected in the output window. If you have selected “Delete PowerBuilder-generated object files” when you connected to source control, the object file will be deleted from the folder after the Check Out is complete.
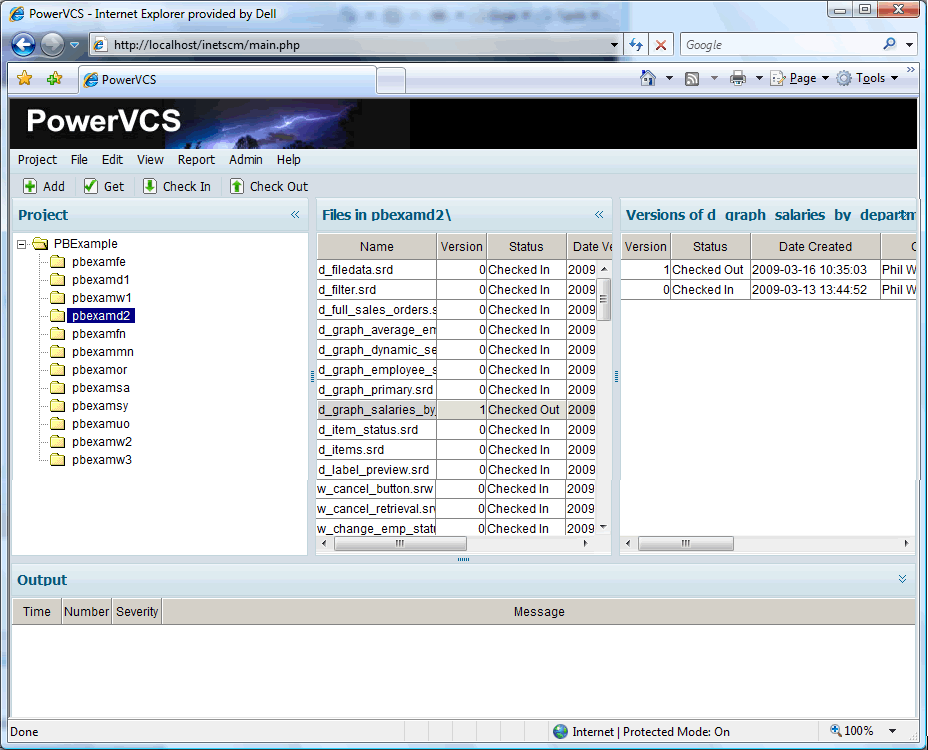
Note also that the icon next to the object in the System Tree has changed to a green check mark to indicate that the object is checked out.
|